
I'm a big fan of using tissue paper pom poms in my party decor. What I love about them is that they are inexpensive and can be used in a wide variety of events.
I think many of you love this idea as well–this post has been pinned on Pinterest over 300,000 times!
I've used them for birthday parties (like this candy party) and baby shower (like this spring shower) amd many other events. I often get asked how to make tissue paper pom poms—so today, I thought I would share my tips for making and also for buying them (if you're not the DIY type).

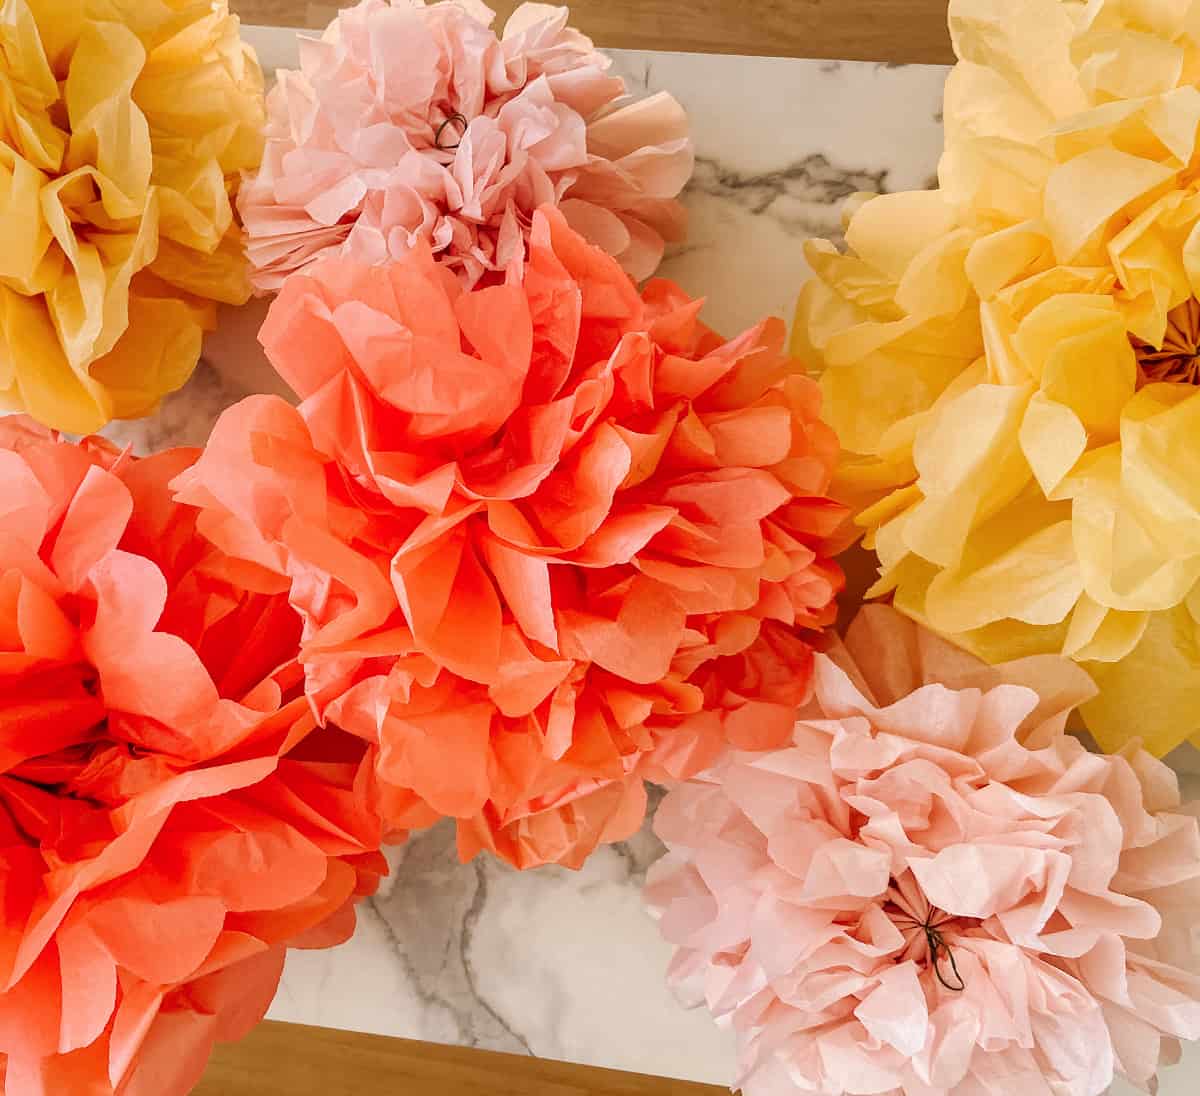
Aren't these tissue poms poms cheerful? I love that you can make them in any color tissue paper so they will match any party theme you come up with!
Jump to:
Supplies To Make Tissue Paper Pom Poms
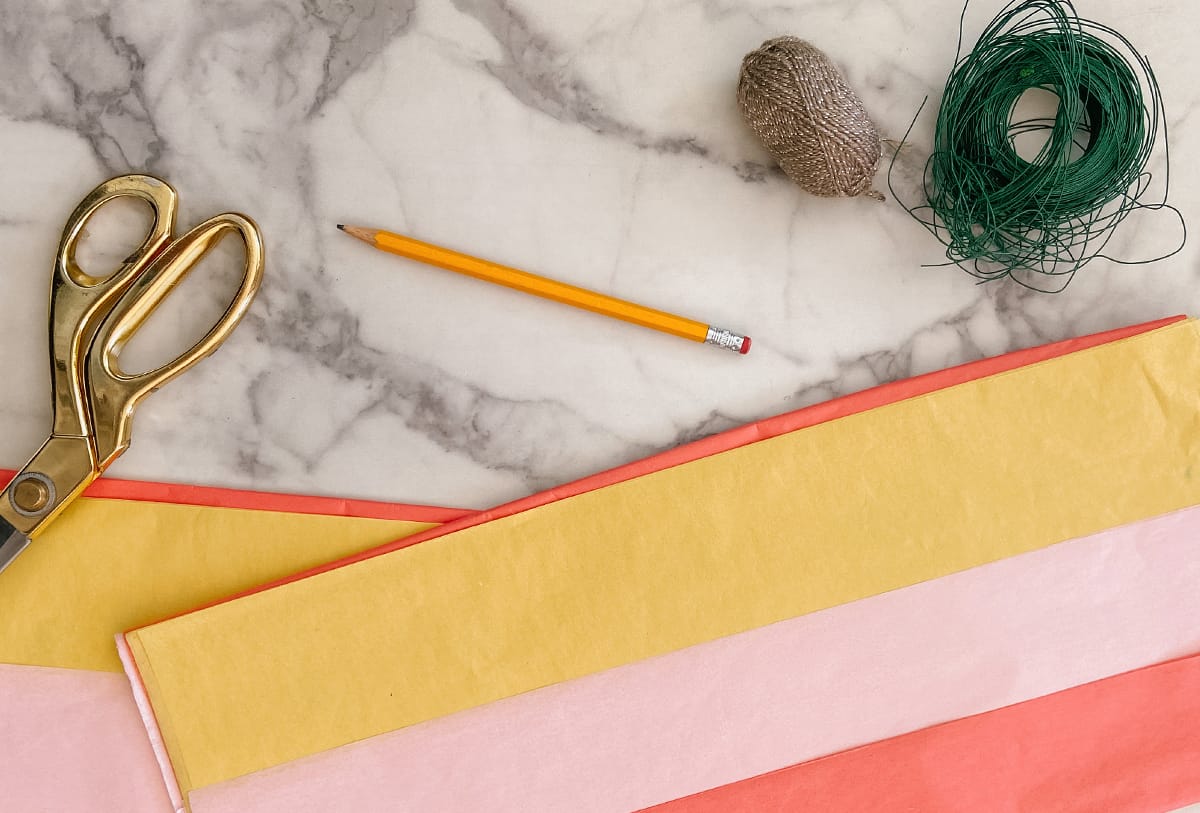
All you need is a few supplies to make these tissue paper pom poms. Start by gathering:
- 8-10 sheets of tissue paper in the same color for each pom pom you want to make
- Pencil
- Scissors
- Floral Wire
- Fishing Line or twine
Instructions For Making Tissue Paper Poms
Don't worry, they aren't difficult to make, but I'll be honest and say they are little time consuming depending on how many you plan on making. If you have a couple nights to dedicate to making them while watching your favorite TV show, I say go for it. Here are the simple steps I follow:
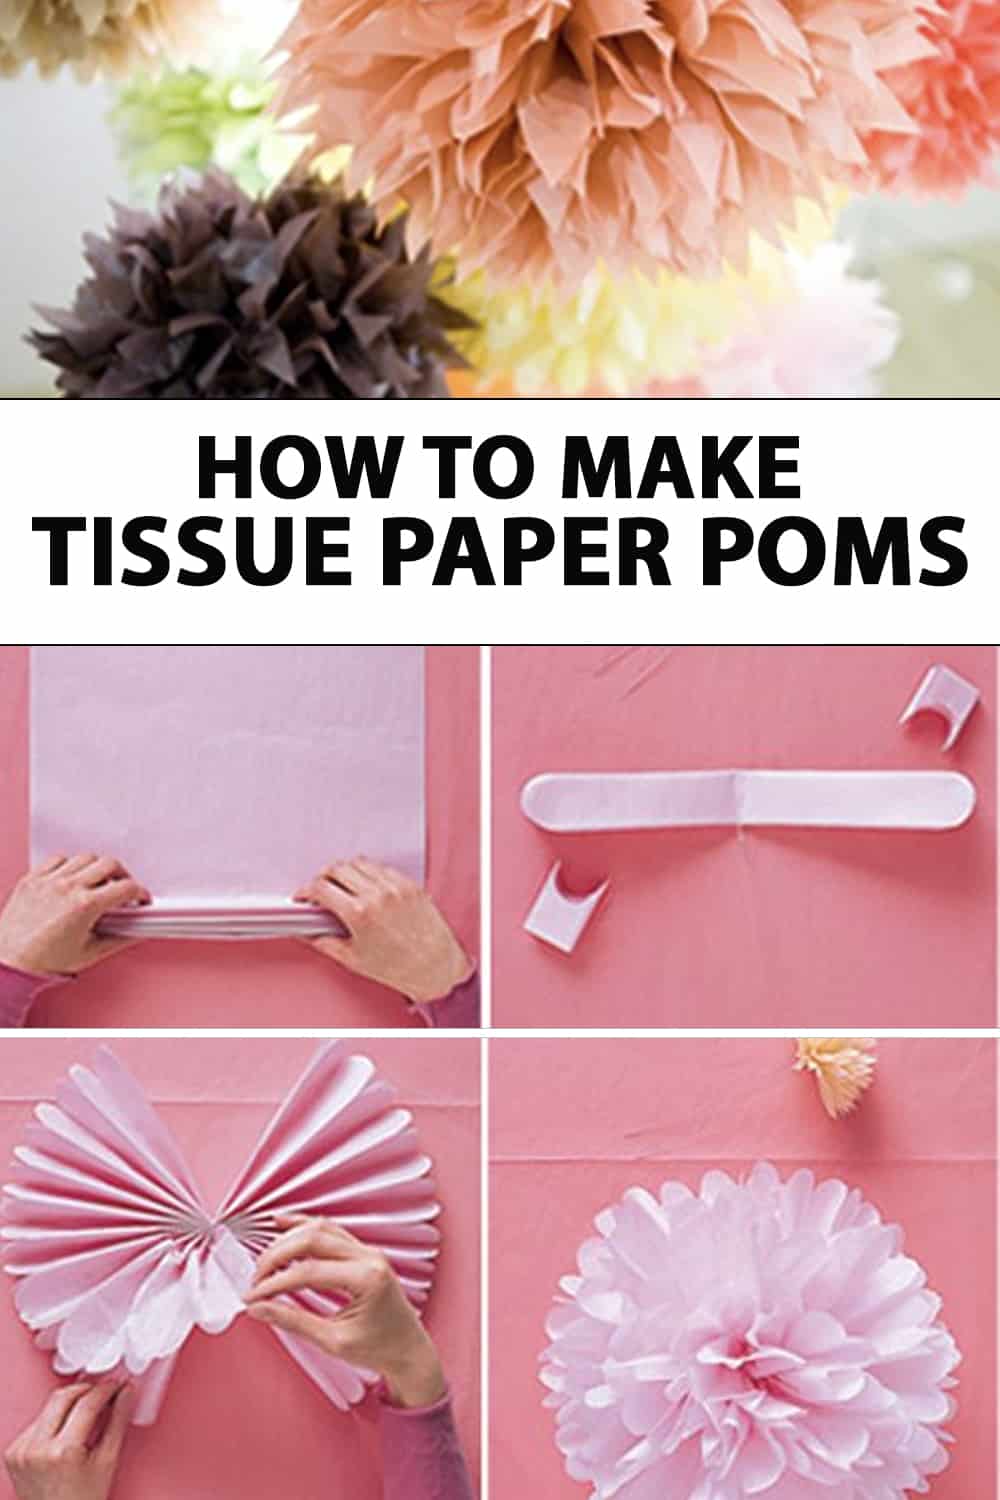
Step 1: Stack Tissue Paper And Fold
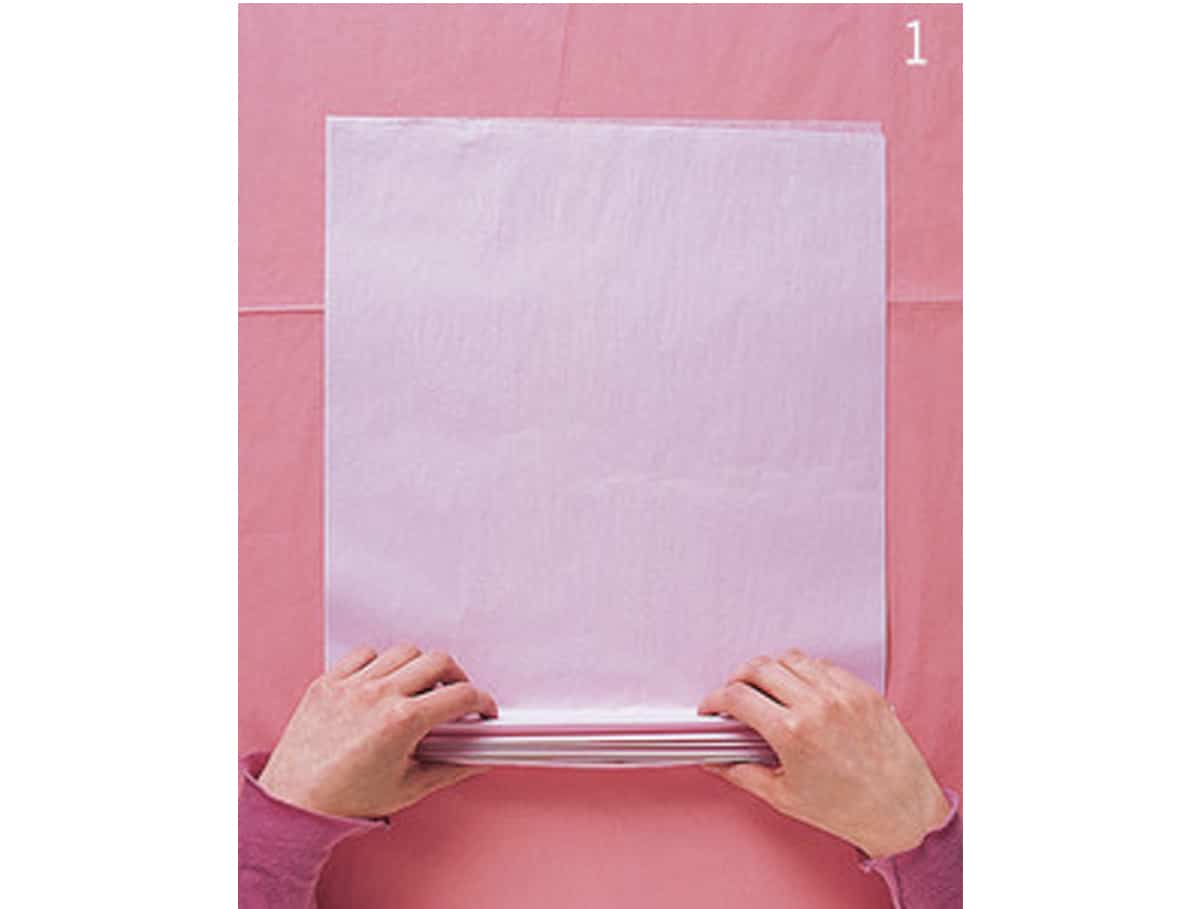
Stack eight to ten sheets of tissue paper. Start by folding over about a 1 ½ inch and making a crease. Continue making accordion folds (creasing well with each fold) until you've folded all the tissue paper.
Step 2: Attach Wire
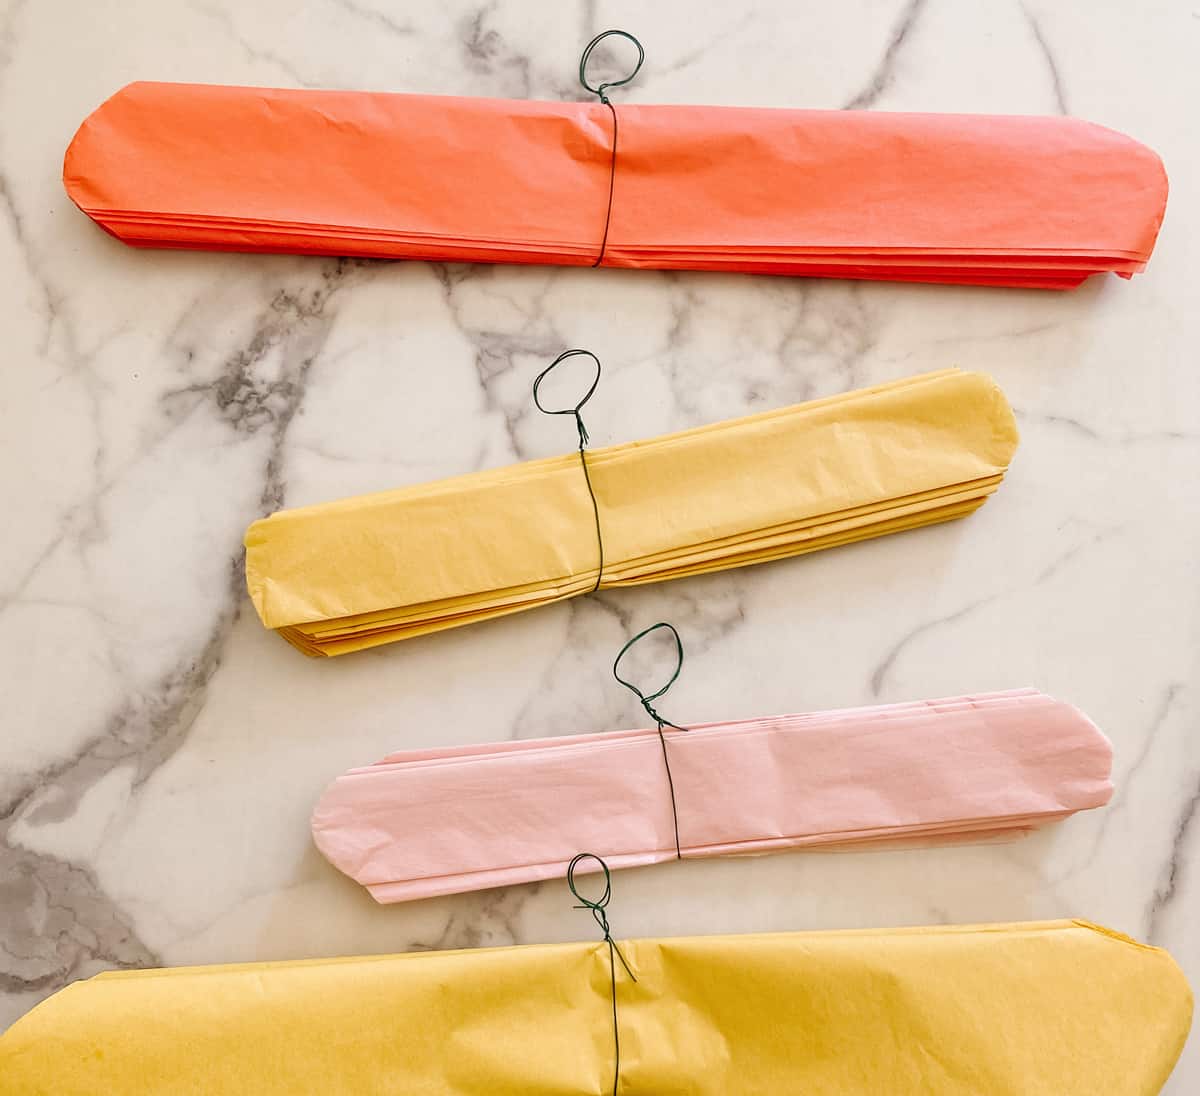
Grab about a 12-18 inch piece of floral wire and fold it in half. Place the wire over the center of the tissue paper and twist so that the wire is taught to the paper and also has a loop on the the other end. This is what you will use to to hang your poms.
Next, using the pencil, mark where you will trim the paper. Trim the ends of the tissue paper. Rounded corners make a more rounded pom look while pointy corners result in a pointier pom pom.
Tip: To make larger poms, you will trim just a little off each end. To make smaller pom poms, you will cut closer to the center where the wire is.
Step 3: Fluff The Tissue Paper Into Poms
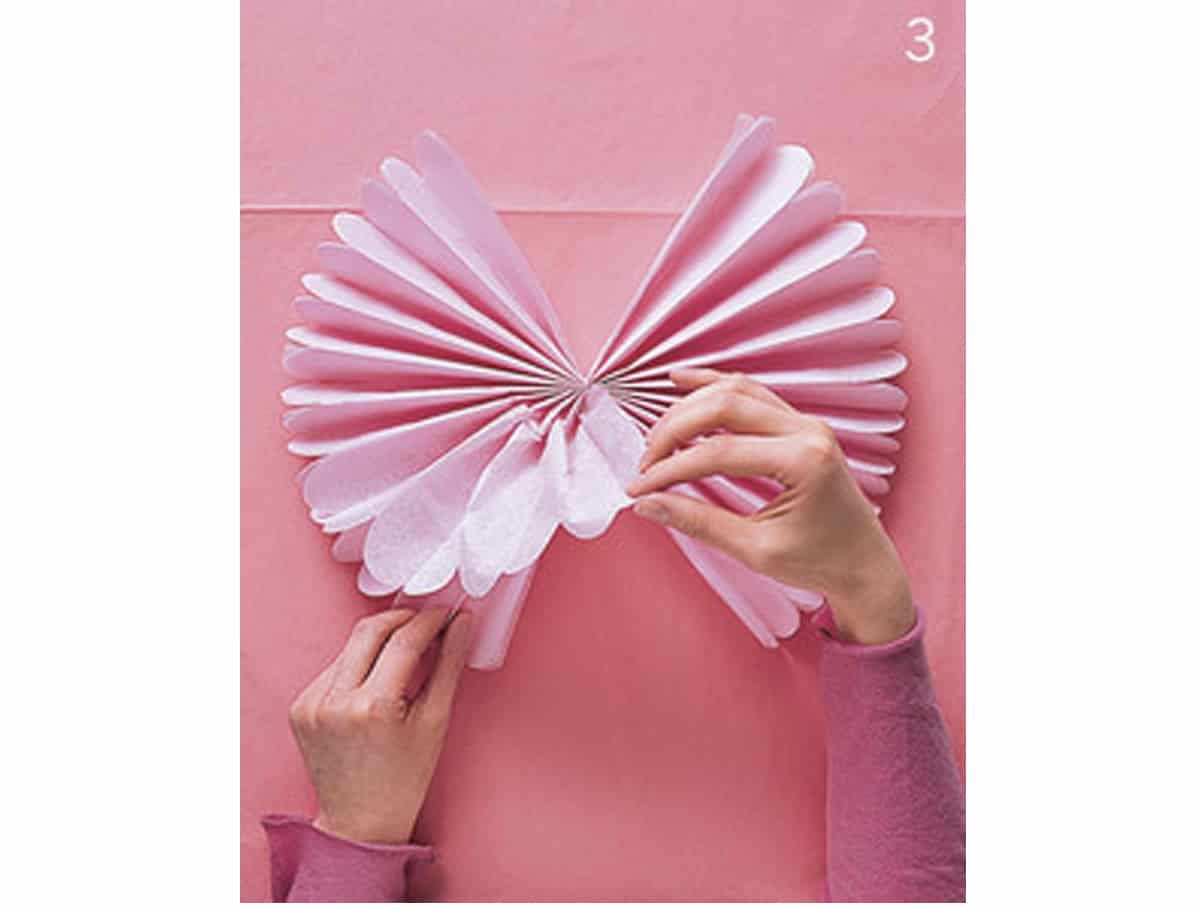
This is the step where you "fluff" the poms. Begin by gently separating layers by pulling away from center one at a time.
Repeat until all the tissue layers are separated and you have a round pom pom
Tip: It's pretty easy to tear one of the tissue layers when you're doing this step. If that happens, don't worry! Typically you can just fluff the pom a bit and it won't be noticeable.
Step 4: Hang Your Paper Pom Pom
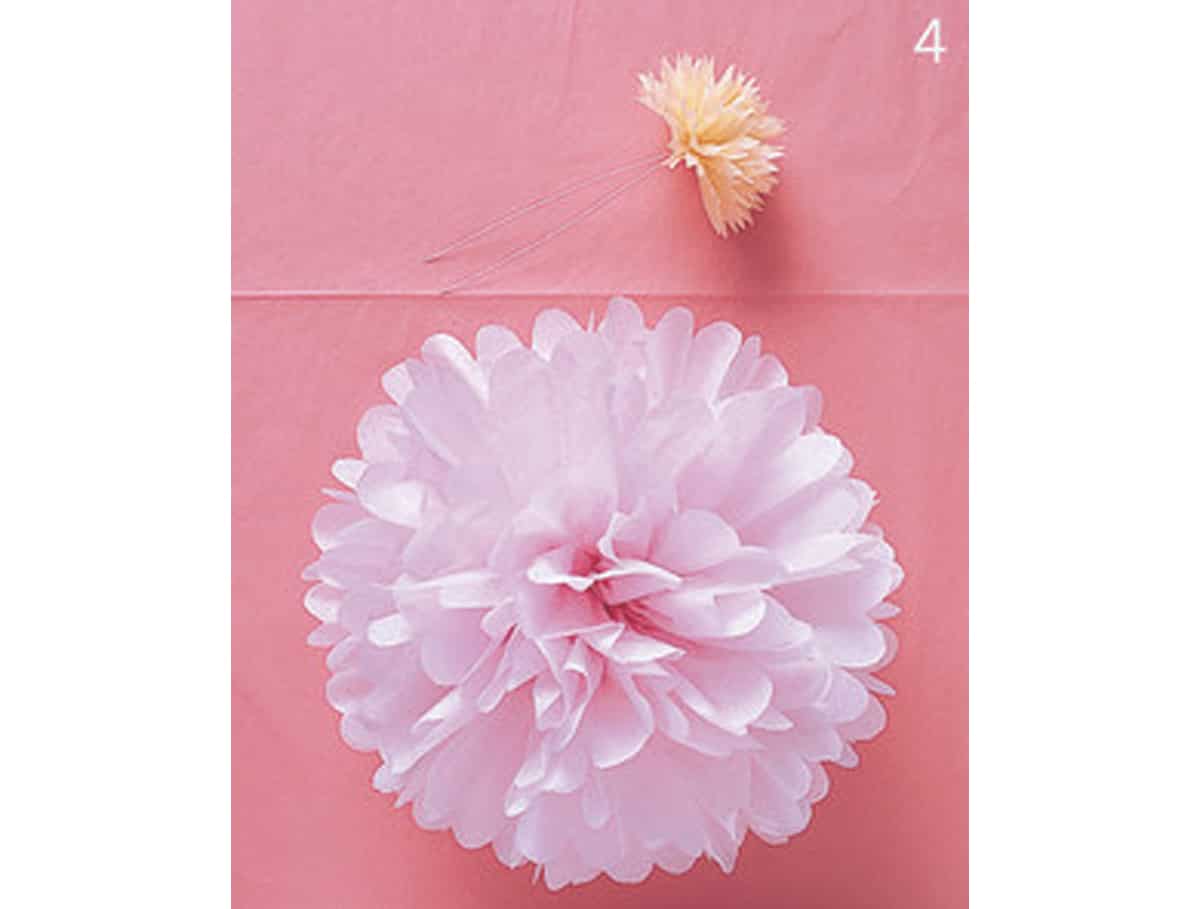
Now that your pom pom is completely fluffed, you are ready to hang it! Using the floral wire in the center, attache a piece of clear fishing line or twine and hang wherever you want your DIY party decor to be displayed.
Additional Tips for This Project
- Before you get started watch this short video on Pinterest where I show you how to make them
- Give yourself some time if you plan on making several of these
- Make these ahead of time and store them loosely in a trash bag. When you're ready to use them, you can gently re-fluff them a bit
- I recommended finding a little higher quality (aka thicker) tissue than what you might typically use for gift wrapping. This tissue is easier to tear and the thicker paper tends to hold up nicer.
- Print out the steps with images so you can have it on hand when you're making these!
If I've scared you or the DIY method just isn't your thing, I suggest just ordering your tissue pom poms or one of these great honeycomb decorations. Purchasing the poms are still an inexpensive party decor item.
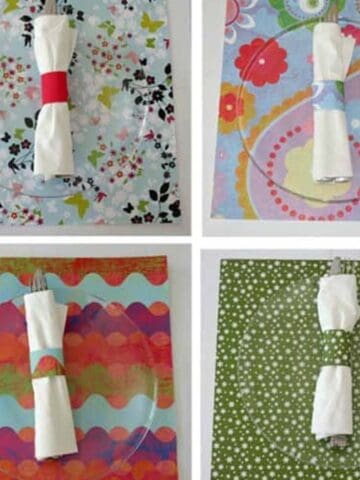
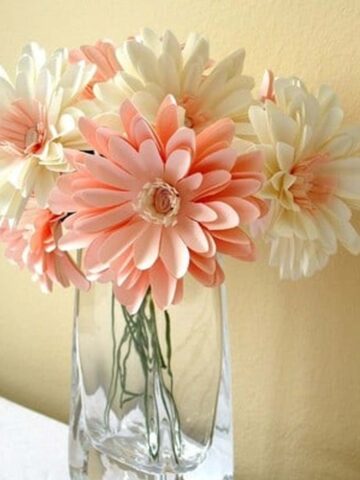
Related DIY Posts
Whether you make them, or buy them, these tissue poms are a great way to add some flair without breaking the budget.
My daughter even re-purposed her poms from her recent birthday party into decor for her bedroom!

Acaylar says
Hi everyone!!! Also to Tori
Umm... I don't understand the steps... Please help me- I AM A POM POM FAN!!!I really love pompoms!!!
michelle says
we dont have a tissue like that here in our place, can i use another kind of paper? can you suggest what kind of paper?
Betty smith says
I would love to make the Pom/poms ,,how do I get the directions other than I.pad?
Caryn says
Where did you find your purple and teal tissue paper? I throwing a baby shower and those are the colors I'm using! Love this idea! Thanks for sharing!
Tori says
Hi Caryn! It was years ago and I remember picking some up at Target and the other up at a small specialty store. I would look around online too, I bet you can find exactly what you need and have it delivered. Good luck!
Dana says
I would like to hang these from my bedroom ceiling. Do you have any suggestions on how i could fasten the wire to the ceiling?
Tori says
Hi Dana! I have done this several times using thumbtacks. Just "wrap" clear fishing line around the tack and then press it into the ceiling. If your paint is white, use white tacks. If not you can always paint the flat tack head to match your ceiling so it's not noticeable.
shadoulady says
I made these for a teen dance party several years ago. I had no budget, so colored tissue paper was out. After making the
'flowers', I diluted Rit Dye and sprayed them different colors. They were awesome! Thanks for reminding me of this
fun project!
Tori says
Catherine, you could trace the shape that you're going to trim. Thank might help make them even (though I don't think they have to be perfect to look good).
Catherine says
We made these for an office party. Fantasic! Cutting the edges evenly was difficult. How did you cut yours so uniformly?
cassandra says
you could use the wire from the garbage bags, ribbon, yarn, string, rubber bands...anything tying it together would work.
Tori says
Hi Kelcie, possible -- though I'm not sure it'd be long enough. Worth a shot though!
Kelcie says
Do you think a paper clip would work instead of floral wire?
Mari says
Why isn't mine in a round/ball shape?
Your Hostess says
Marie -- did you round the corners of the tissue?
Hostess Tori says
Stephanie, the "longer" the tissue paper, the larger the pom will be. So, in step 2 (see the photo above) you would simply snip the corners off for the longest pom possible. Cut more off to make it smaller. And yes, the more sheets of tissue the "fuller" it will be. Hope that helps!
Stephanie says
How big is this pom pom? And, how would you make the pom pom bigger/smaller? Just add or remove sheets of tissue paper? Thanks!
Your Hostess says
@Melissa - I use about 8-10 sheets of tissue per pom pom.
@Lily - Neither! All you need is the tissue and some thin floral wire.
Lilly says
do you use a needle and thread or do you use a hot glue gun to put the flower together.
melissa says
How many sheets do you use?